With step-by-step photos and loads of useful suggestions, learn to make mushy complete wheat bread with this easy-to-follow recipe. You may make this bread 100% complete wheat, or you should use a mixture of complete wheat and bread flour for a barely taller, fluffier loaf. It’s splendidly mushy and flavorful both method! In case you’re new to working with yeast, reference my Baking with Yeast Information for solutions to widespread yeast FAQs.
I do know there’s main comfort with store-bought bread, however I encourage you to strive making it from scratch at the least as soon as. (You may be hooked after that!) This complete wheat bread takes a number of hours, however a lot of the work is hands-off whereas the dough rises. Contemporary-baked bread smells unimaginable and tastes even higher—store-bought sandwich bread simply can’t examine! Wait till you scent a slice popping up within the toaster.
Right here’s Why You’ll Love This Complete Wheat Bread
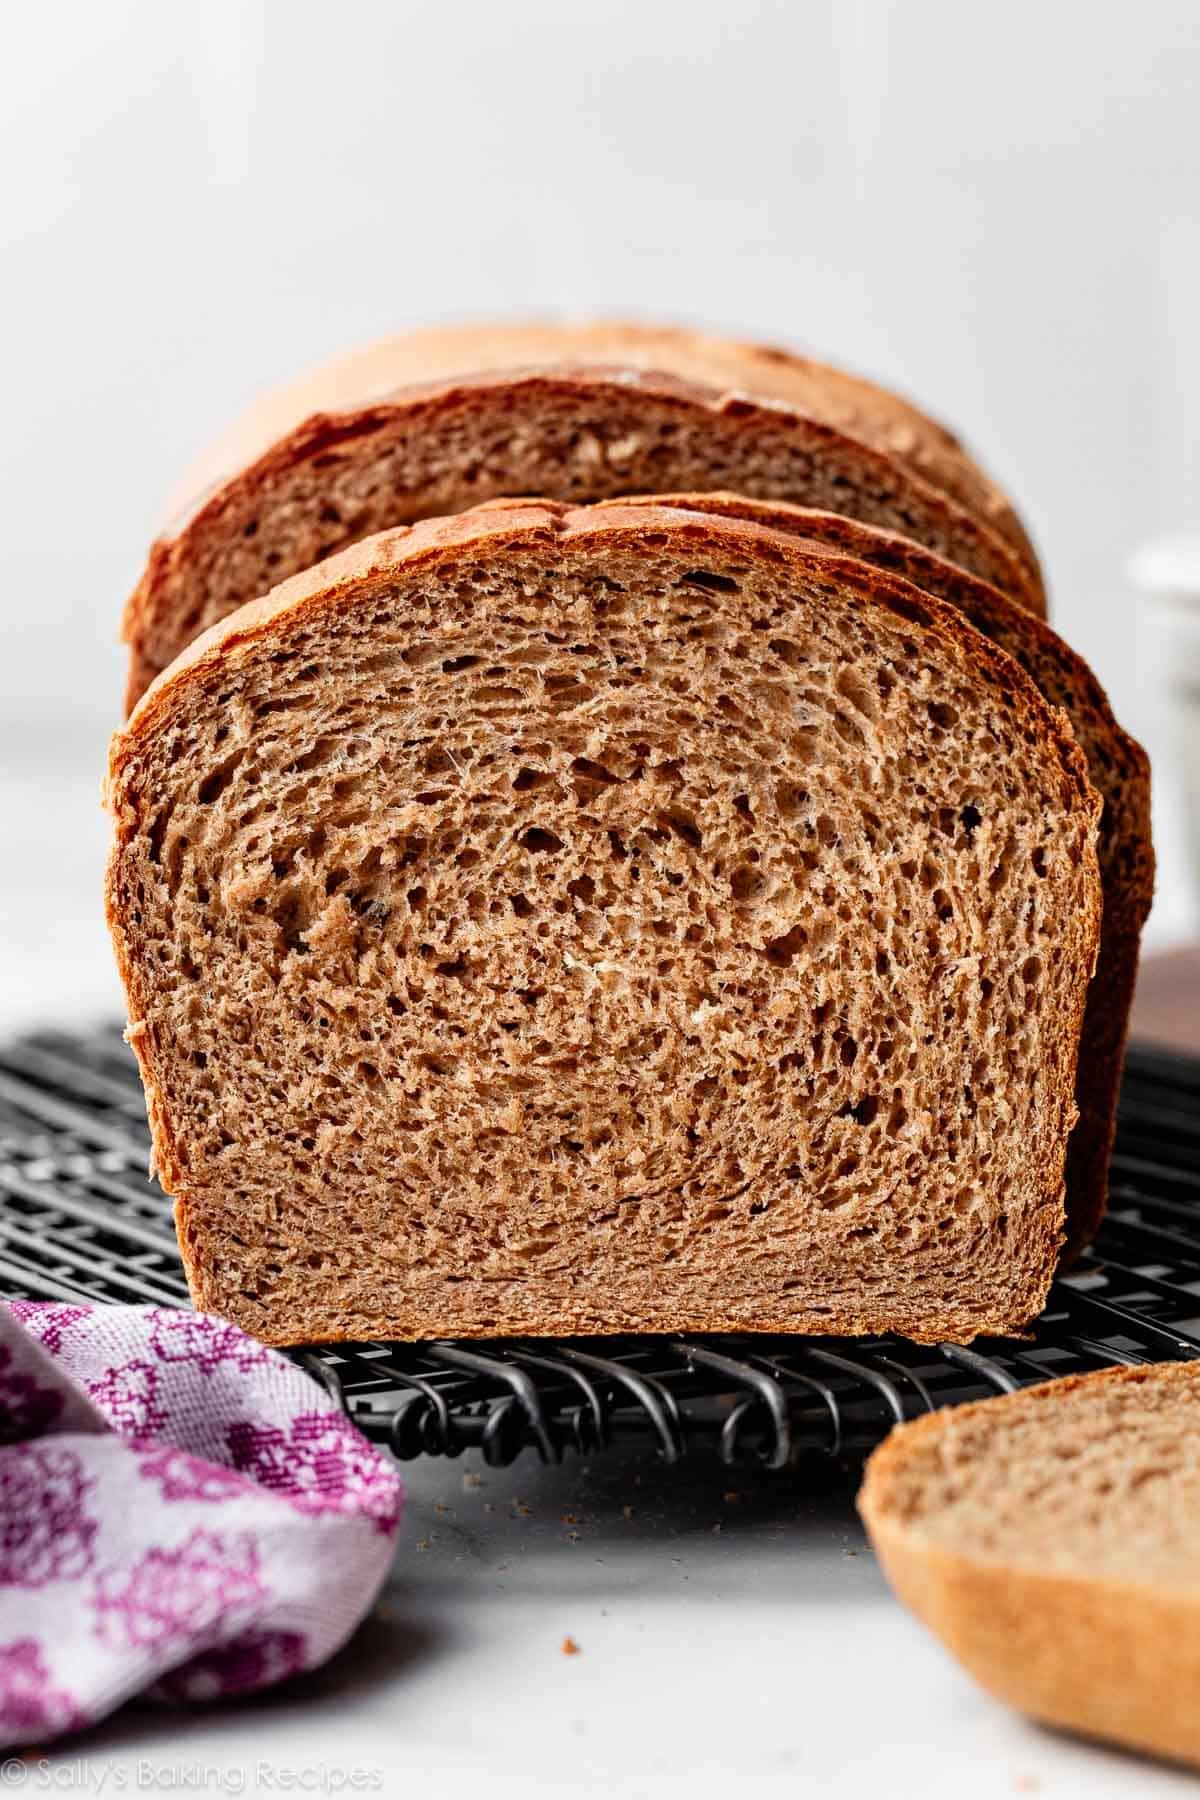
- Chewy crust with mushy texture inside
- Flavorful & hearty
- Flippantly sweetened with honey
- Makes scrumptious toast and sandwiches, and can be utilized in recipes like French toast, breakfast casserole, & sausage herb stuffing
- Straightforward to make forward or freeze
- 8 easy components
Behind the Recipe/Recipe Testing
Till now, I’ve shied away from trying 100% complete wheat bread, as a result of creating a recipe for a superbly mushy and attractive loaf was a tall order. Why? As a result of complete wheat flour is finicky and could be tough to get proper in a bread recipe.
There are often 2 key issues relating to utilizing 100% complete wheat flour in a bread recipe.
- Due to the bran layer of the wheat grain, bread utilizing 100% complete wheat flour can style bitter or bitter. (Nonetheless, all the time be sure that your complete wheat flour is recent; it could develop into rancid if saved for too lengthy.)
- Complete wheat flour doesn’t comprise the identical degree of gluten as white flours. This lacking gluten can produce a dense and/or flat loaf. Many complete wheat bread recipes name for the addition of important wheat gluten to make up for it, however I don’t often maintain that in my kitchen… and chances are you’ll not both.
I skilled each points in my preliminary makes an attempt at this recipe. I discovered that including just a little acid to the dough helped offset the bitterness, and introducing a preferment “sponge” helped give the loaves higher taste, in addition to extra top. Clearly complete wheat bread won’t ever be as mushy, tender, and chewy as white sandwich bread, however this one comes fairly shut with my cautious recipe & options.
Finest Elements to Use in Complete Wheat Bread & Why:
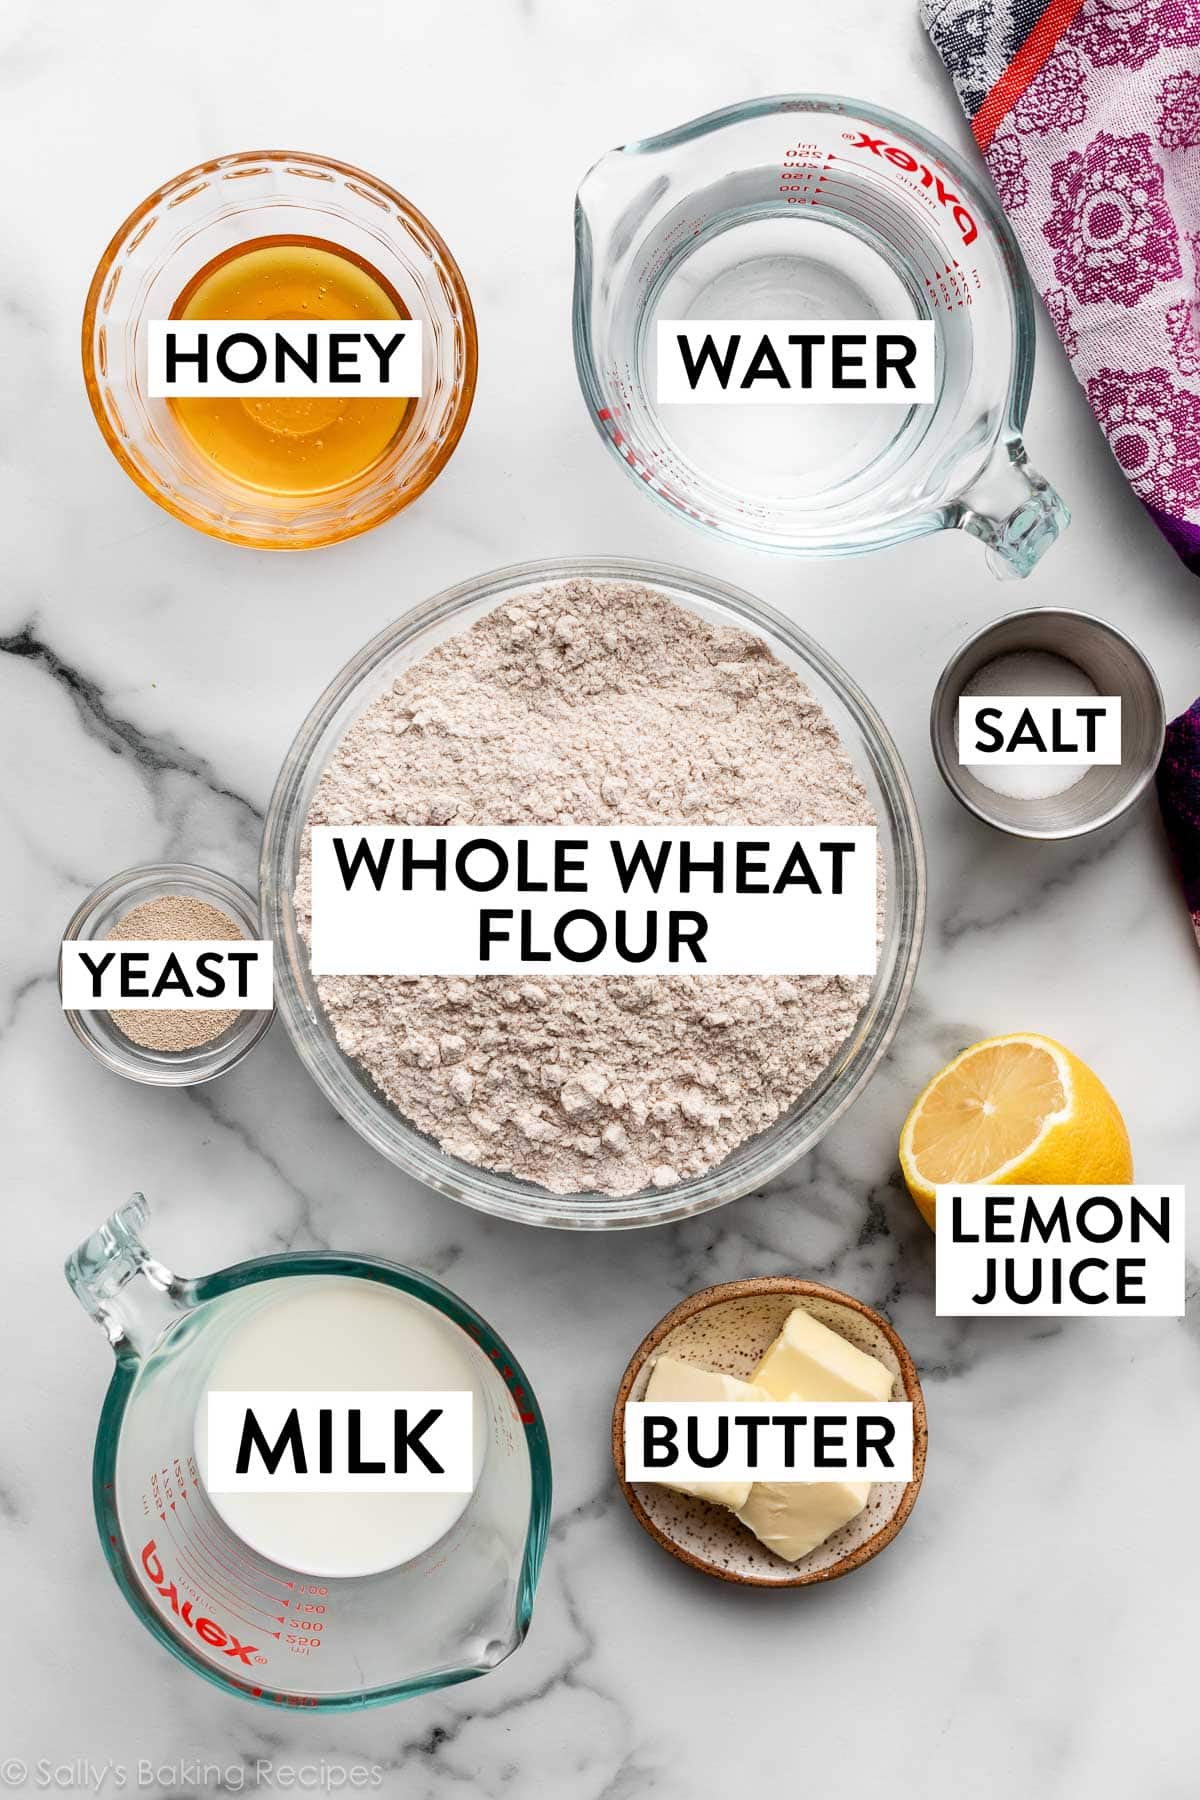
- Water: Heat liquid prompts yeast. I exploit largely water on this dough as a result of we want a bread that has construction. Utilizing all milk, like I do for my complete wheat dinner rolls, would yield a flimsy bread with out a lot texture, which isn’t very best for slicing as sandwich bread.
- Complete Milk: To yield a mushy bread, you want fats within the dough, so be sure that a few of the liquid is milk. Low-fat or nondairy milk works too, however complete milk produces phenomenal texture and I extremely advocate it.
- Yeast: You need to use energetic dry yeast or prompt yeast. If utilizing energetic dry, the rise occasions shall be a bit longer. I examined it with each.
- Honey: Honey feeds the yeast, will increase its exercise, and frivolously sweetens the bread. In our testing, my workforce & I unanimously agreed honey was the tastier possibility over common granulated and brown sugar. I additionally use just a little honey when making complete wheat pizza dough.
- Butter: Butter guarantees a flavorful loaf.
- Lemon Juice: This ingredient could appear unusual, nevertheless it’s important for stopping the bread from tasting too bitter. In case you don’t have lemon juice, apple cider vinegar is a superb substitute.
- Salt: You’ll be able to’t make flavorful bread with out salt!
- Flour: You need to use all complete wheat flour, or swap 1 cup of complete wheat flour for 1 cup of bread flour. The bread is mushy both method, however just a little bread flour yields a barely taller, fluffier, and lighter loaf. We get pleasure from it each methods.
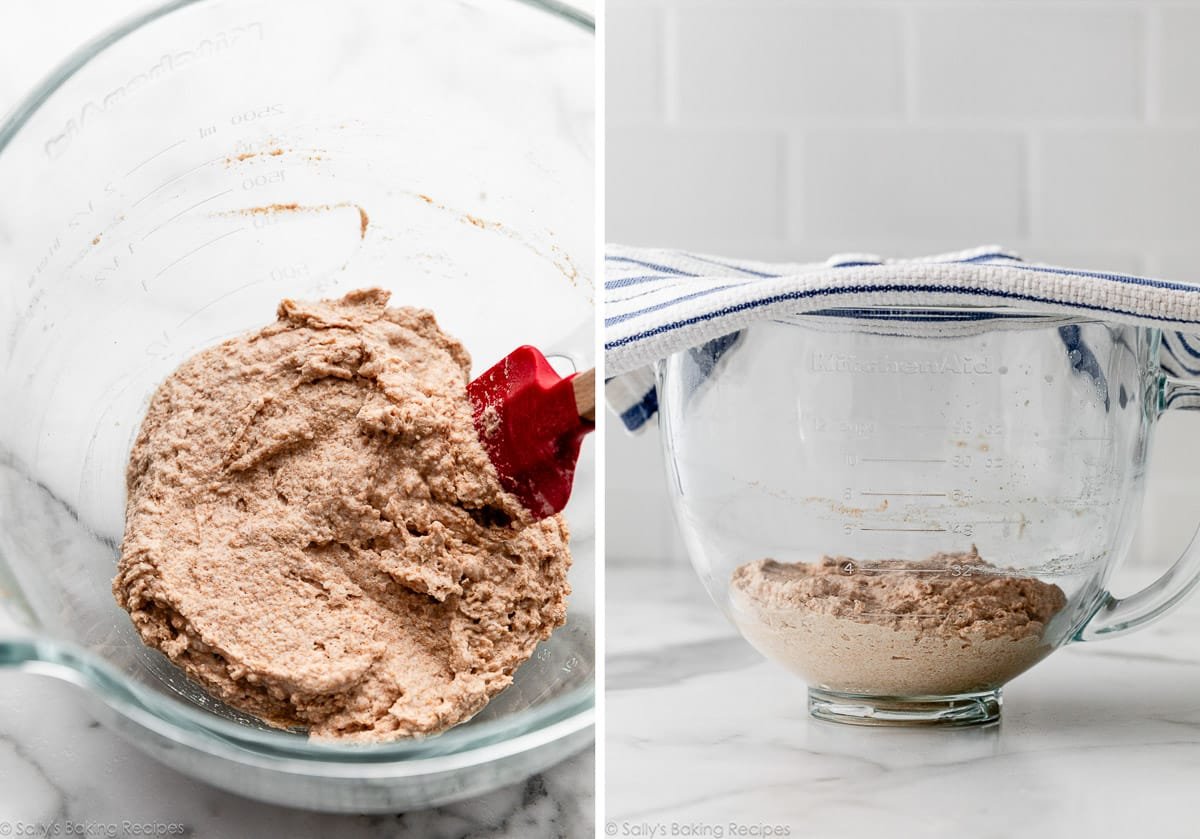
Begin With Making the Sponge (It’s Straightforward)
For the sponge, you’ll use all the liquid (each the water and milk) and yeast within the dough, plus a few of the flour. Combine this all along with a spatula, cowl it frivolously, and let it double in measurement for about 60 to 90 minutes.
Whereas this step does lengthen the full time of the recipe, the sponge is essential for producing a extra complicated taste, and provides the bread a lighter texture. By skipping this step, your bread shall be just a little flat. (In style and look!)
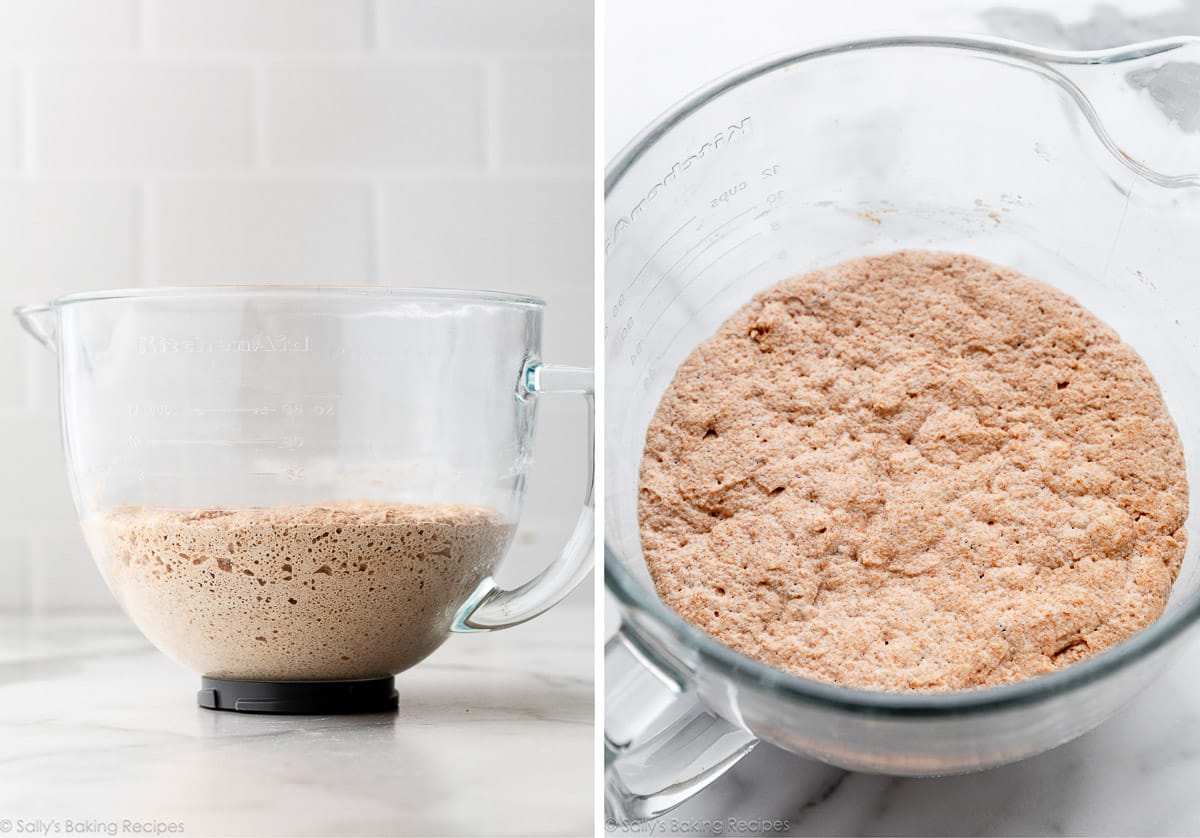
As soon as the sponge doubles in measurement, add the remaining components and start mixing, which is able to deflate the air and make method for the ultimate dough.
That is the sponge earlier than rising:
That is the sponge after rising:
At this level, the method follows my sandwich bread fairly intently. You’ll knead the dough, then let the dough rise twice. Lesson you’ll be taught at present: making a scrumptious complete wheat bread isn’t a race. We will need to have some persistence right here! (A tough ask when selfmade bread is the reward…)
Step Photographs to Assist You
Make the dough: I like to recommend utilizing a stand mixer with a dough hook attachment (most stand mixers are bought with it). In case you don’t have a stand mixer, combine the dough along with a spatula or wood spoon (and just a little arm muscle!).
Knead the dough: You’ll be able to proceed beating the dough with the dough hook, or you possibly can knead the dough by hand.
1st rise (about 2 hours): After you knead the dough, cowl it and let it rise in a comparatively heat spot. Complete wheat dough requires a barely longer rise time than white sandwich bread as a result of it’s weighed down with wheat germ and bran.
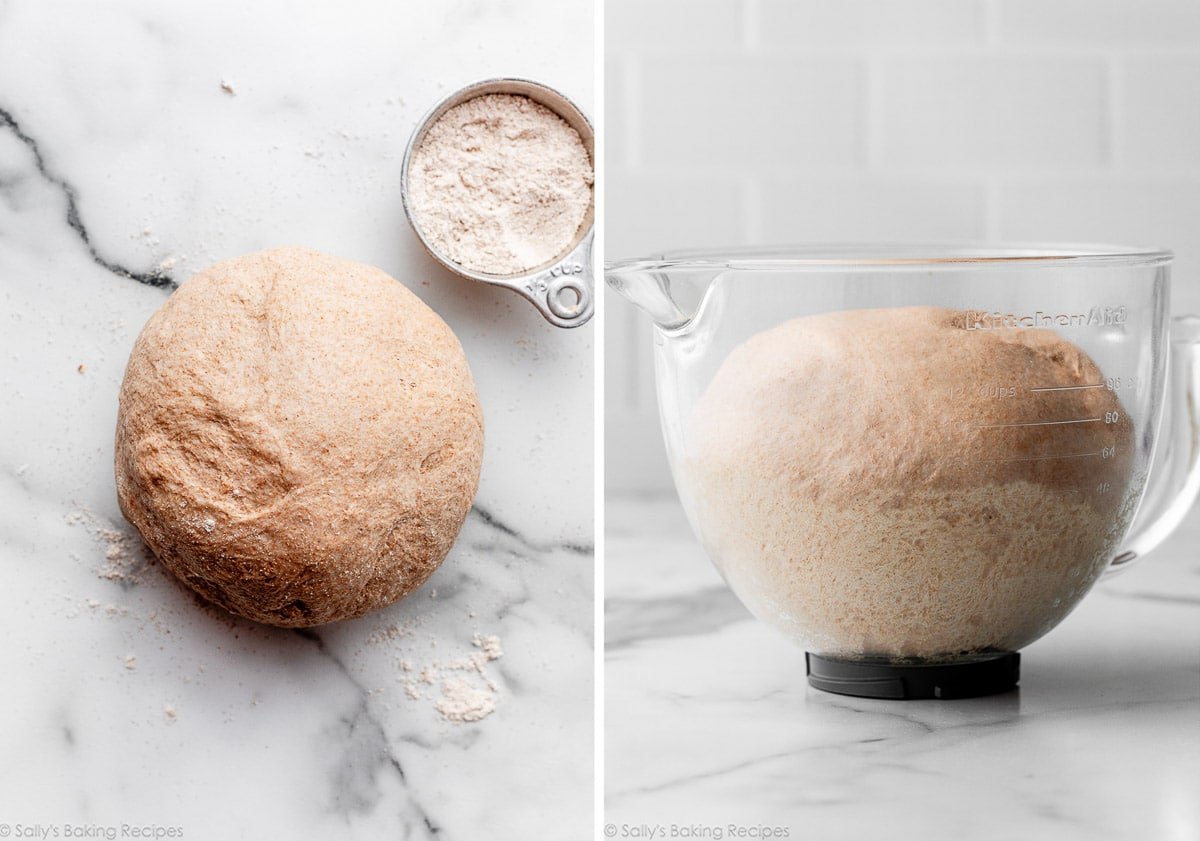
As soon as it has doubled in measurement, punch it all the way down to launch the air.
Roll it out into an 8×15-inch rectangle:
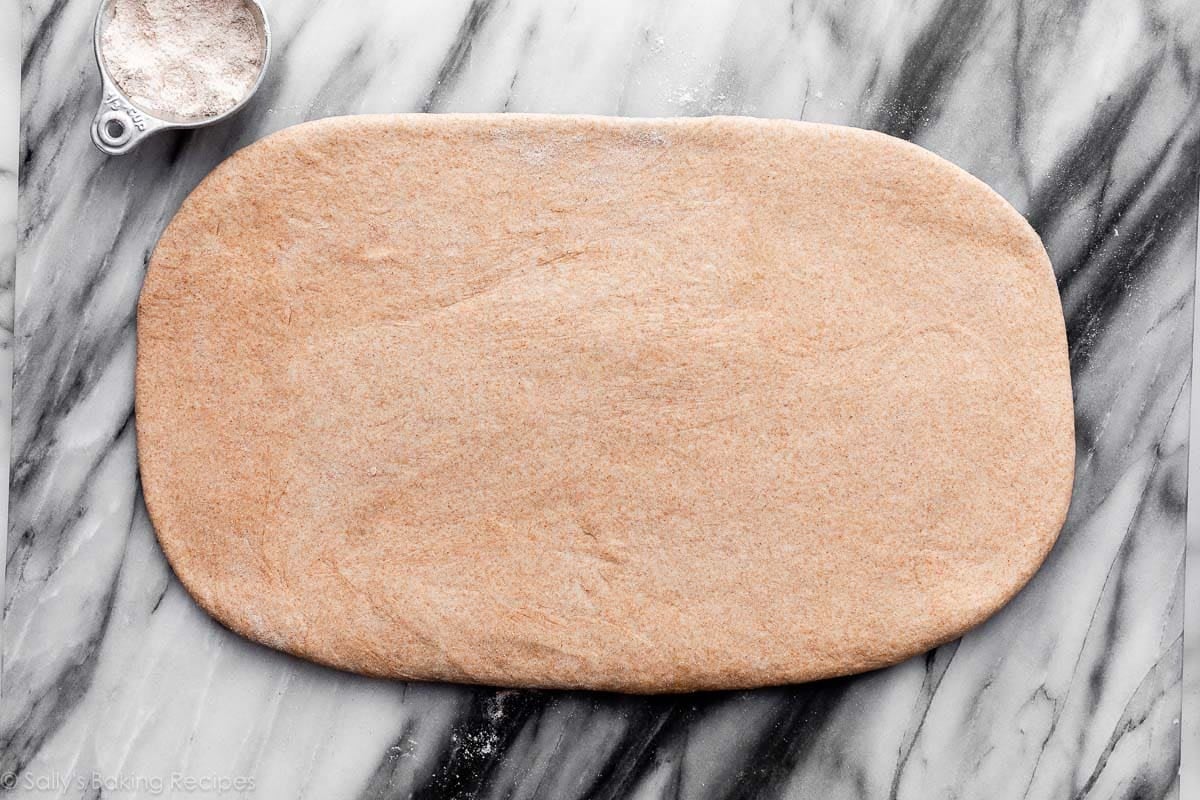
Roll it up tightly beginning with the 8-inch facet, so you will have an 8-inch roll to suit into your greased 9×5-inch loaf pan. (In contrast to cinnamon rolls, the place you roll up the dough beginning with the bigger facet.)
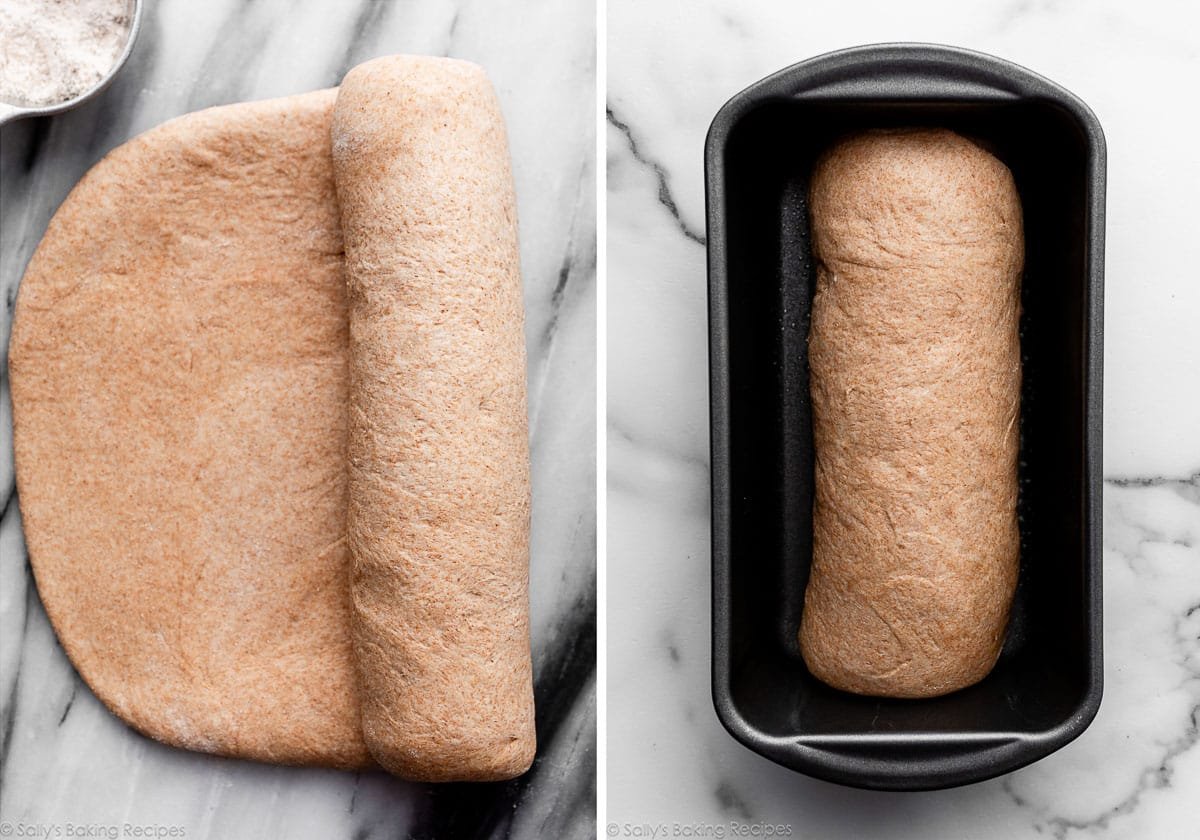
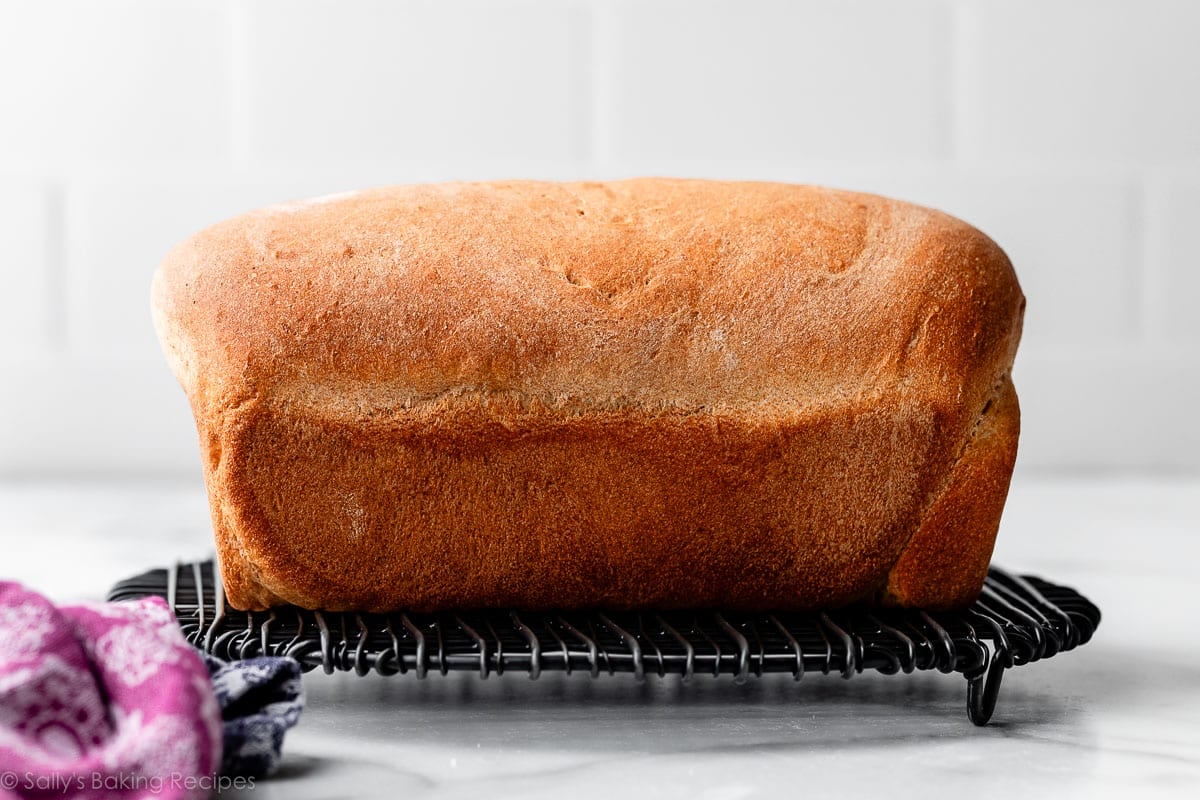
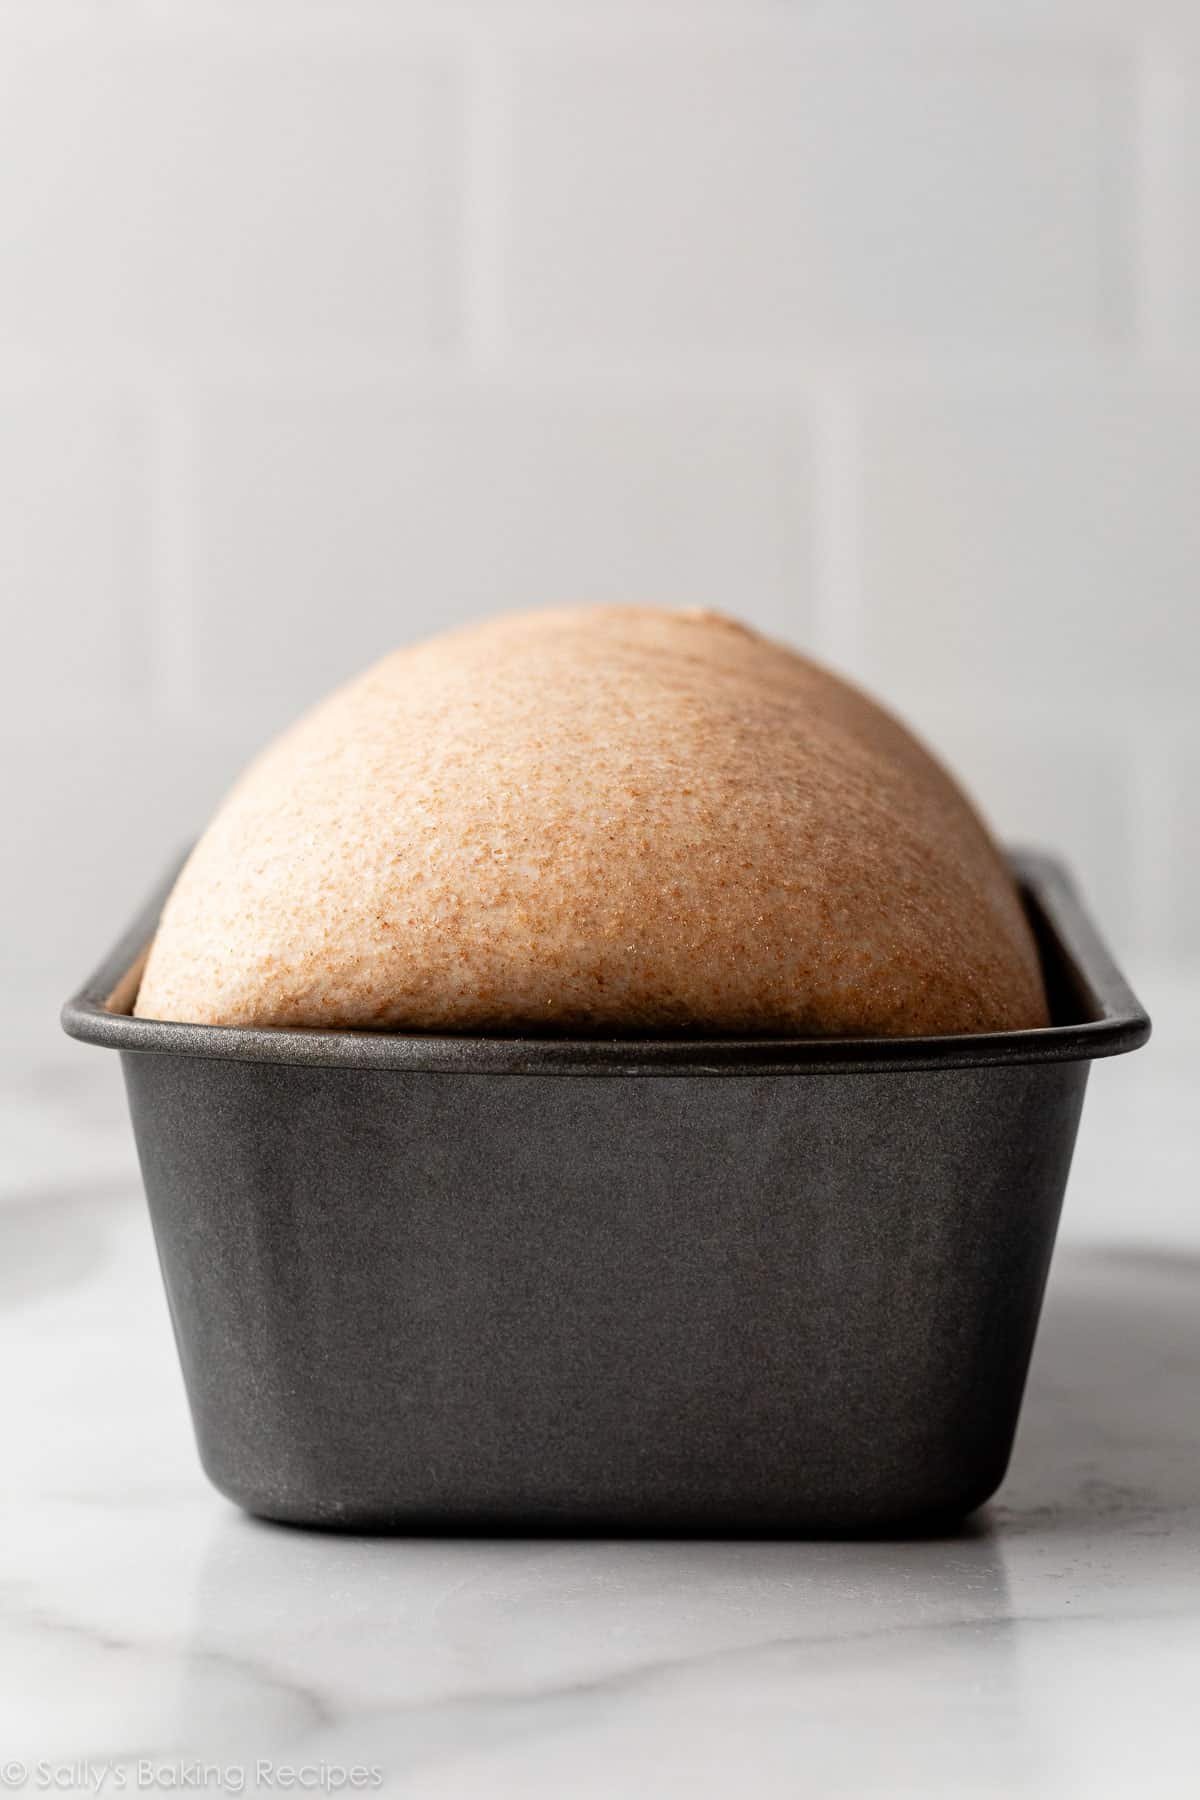
2nd rise (at the least 1 hour): Let it rise till it’s about an inch above the rim of the pan. Don’t rush this 2nd rise, until you need a flat loaf.
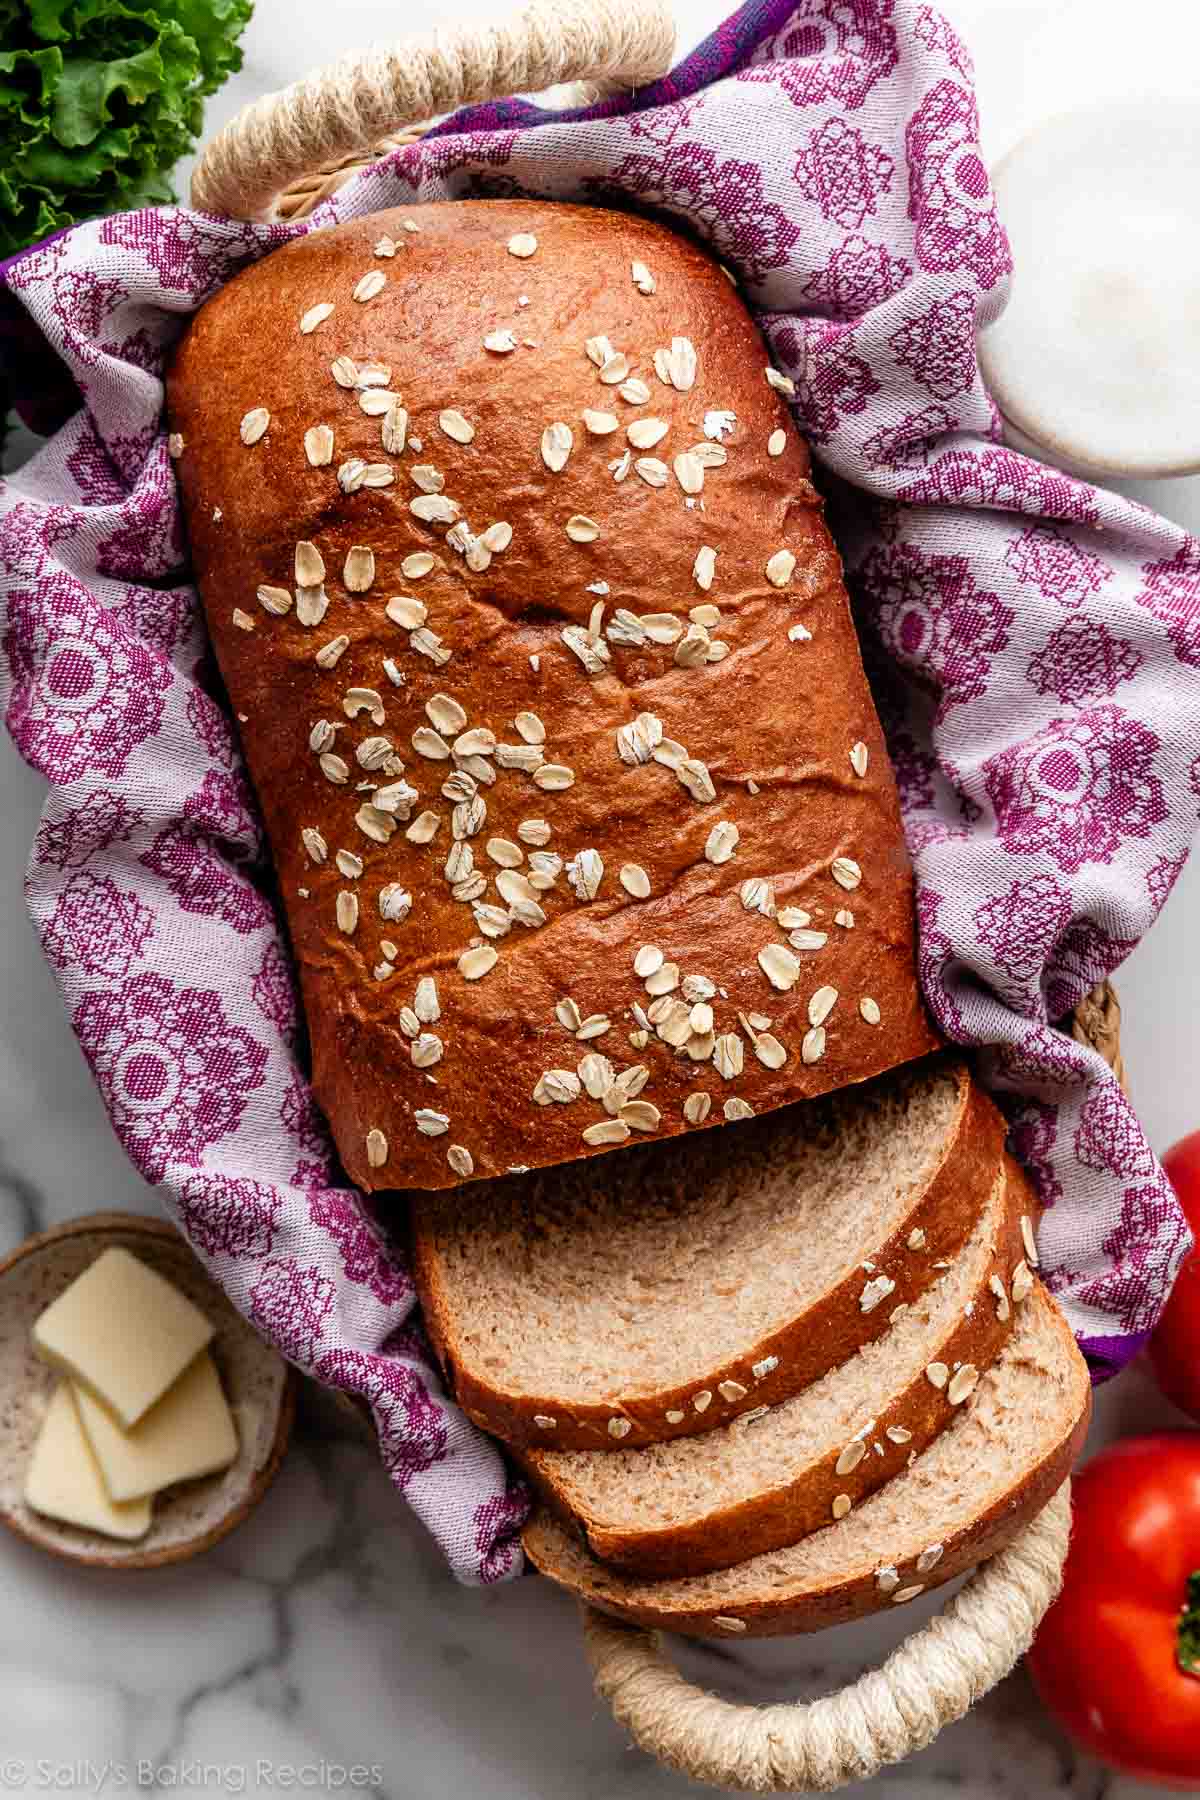
And bake! This complete wheat sandwich bread takes about 36–40 minutes within the oven.
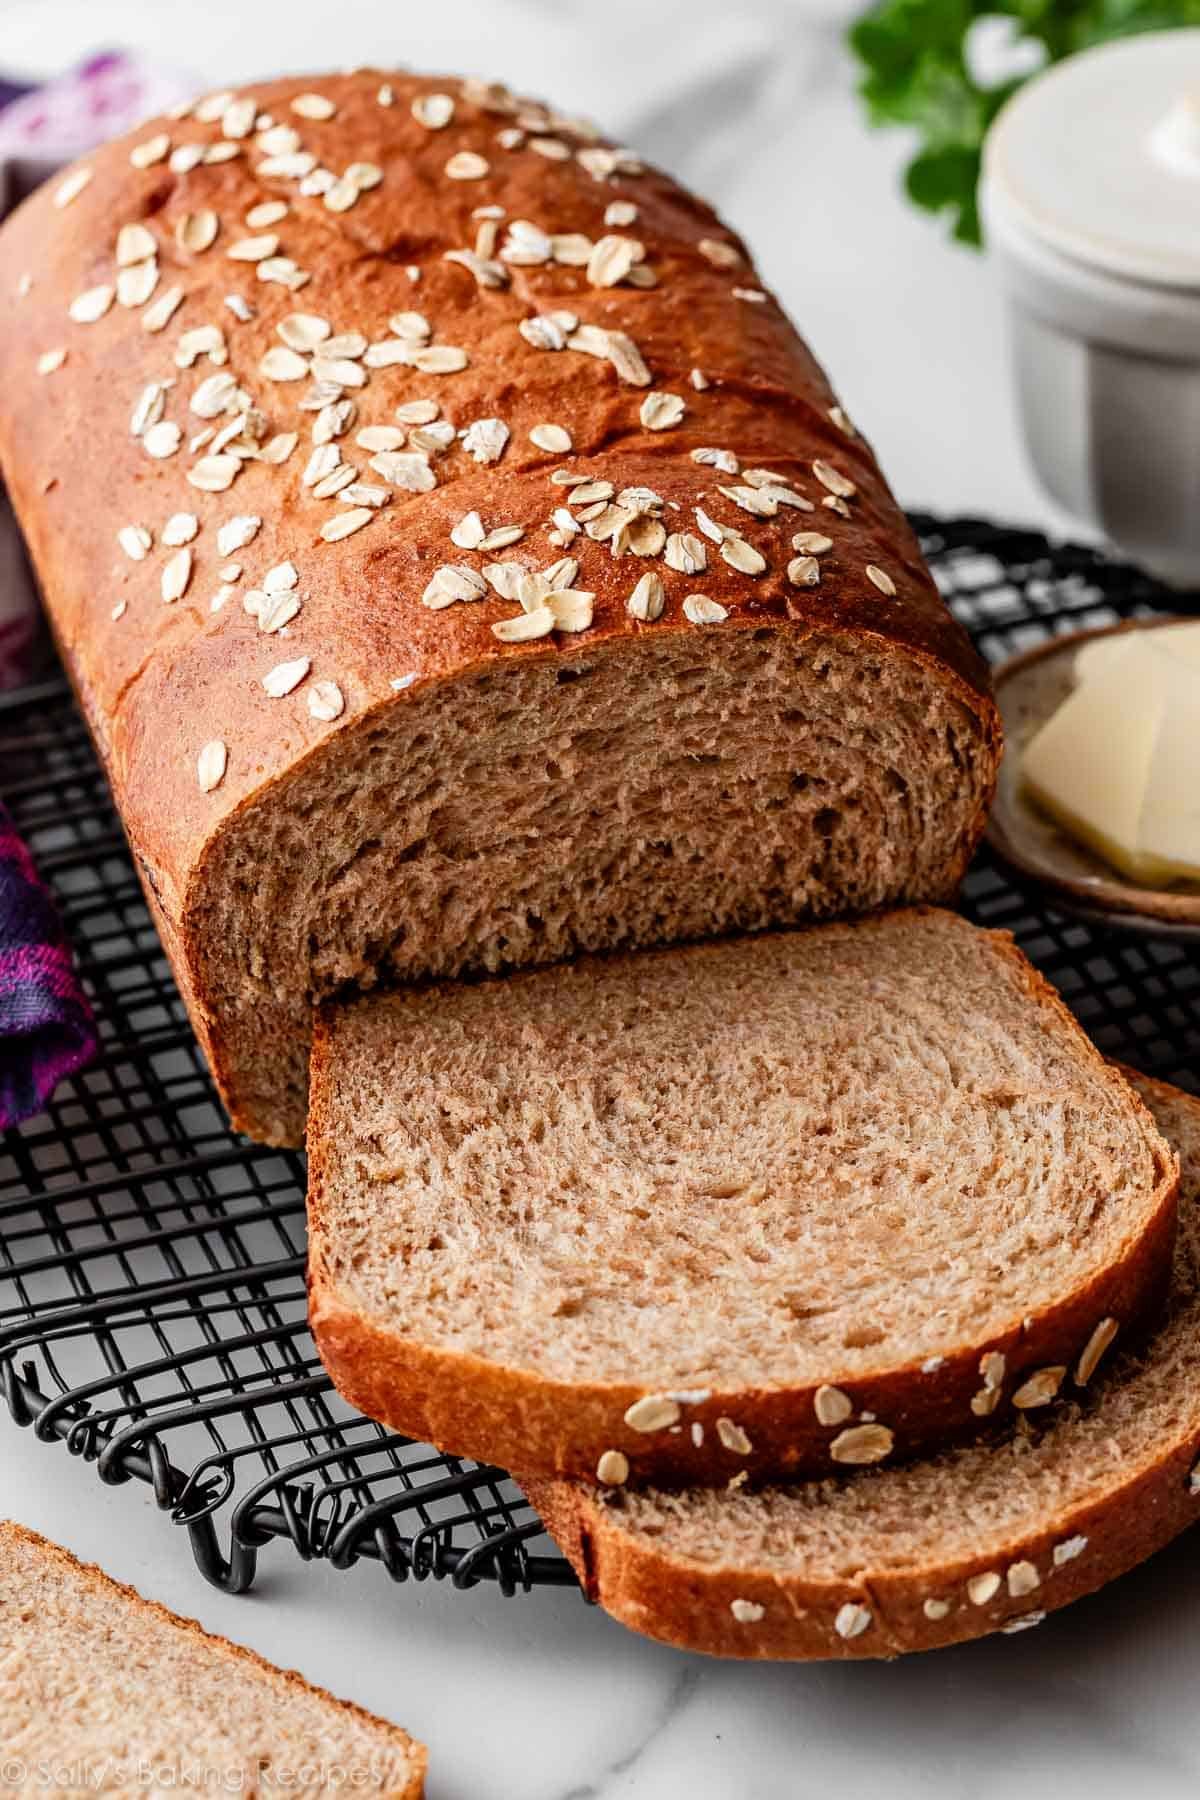
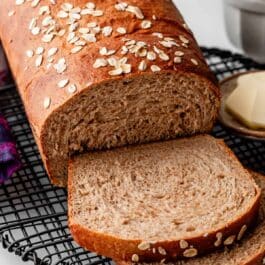
Earlier than baking, be happy to high the bread with oats. You’ll must brush overwhelmed egg white on high of the dough earlier than including the oats, in order that they stick. The oat topping is elective.
Success Tricks to Preserve in Thoughts
- You may make this loaf of bread 100% complete wheat, or exchange 1 cup (about 125-130g) of the entire wheat flour with bread flour for a lighter, taller, fluffier loaf. The instructions stay the identical.
- Knead the dough for a very long time, at the least 8 minutes. When you’ve got a stand mixer, use it for this recipe. It is a heavy complete grain dough, so it requires quantity of kneading to assist produce a extra elastic construction.
- When kneading, keep away from including an excessive amount of flour; a barely cheesy and mushy dough is OK.
- Use an prompt learn thermometer to test the inner temperature of the baked bread. This ensures you gained’t under-bake or over-bake the bread. It’s an extremely useful baking software! The bread is finished when the middle of the loaf is 195–200°F (90–93°C).
- In case you’re new to working with yeast, please overview my Baking with Yeast Information the place I embrace sensible and easy-to-understand solutions to many yeast FAQs.
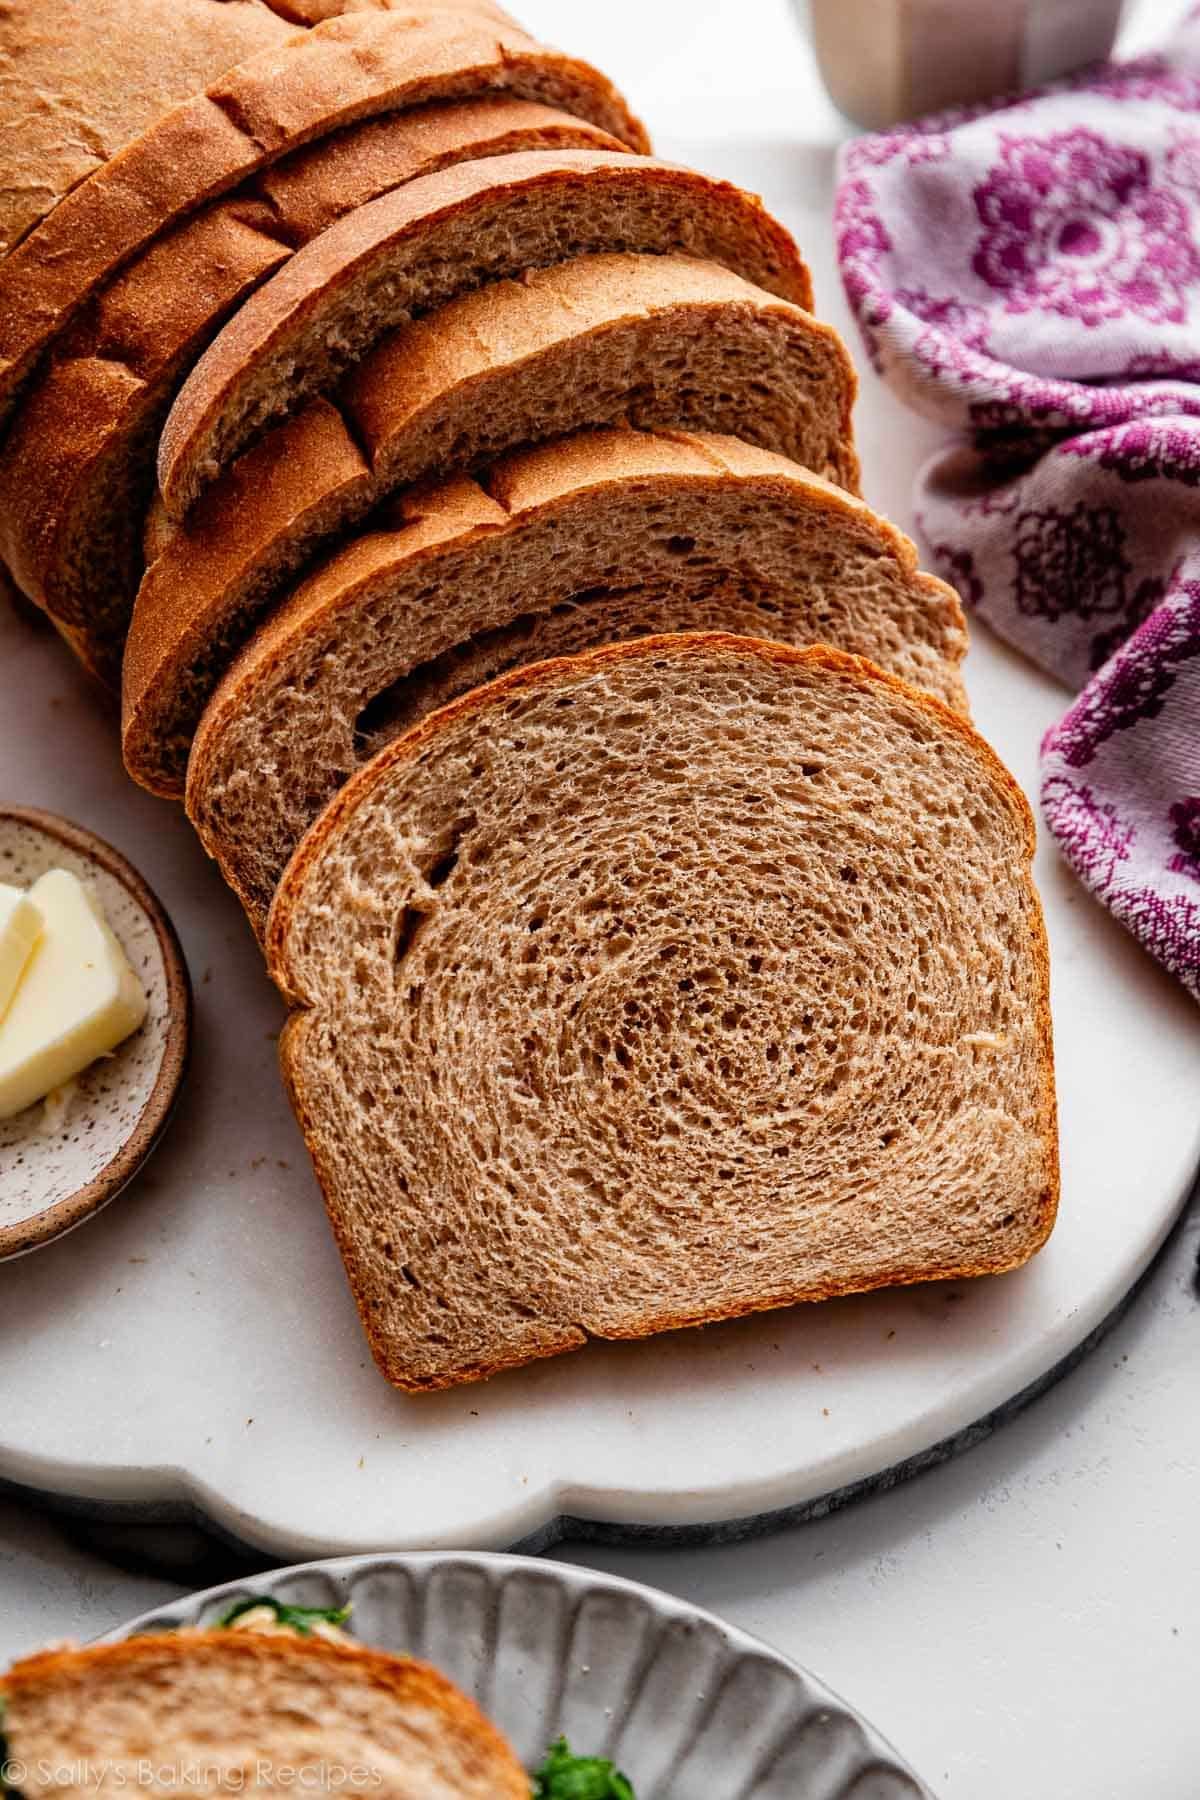
This complete wheat bread is phenomenal when sliced and served heat. The outside is crisp and crusty, and the inside is hearty, but mushy.

Turn out to be a Bread Baker with My Approachable Recipes:
Complete Wheat Bread
Prep Time: 4 hours, half-hour (contains sponge and rises)
Prepare dinner Time: 38 minutes
Complete Time: 5 hours, 10 minutes
Yield: 1 loaf
Class: Bread
Methodology: Baking
Delicacies: American
Description
You solely want 8 easy components to make this complete wheat sandwich bread. Gentle with a chewy crust and oh-so-flavorful, store-bought sandwich bread simply doesn’t examine. You need to use 100% complete wheat flour, or you possibly can swap in some bread flour. See recipe Notes for freezing and in a single day directions. You may as well reference my Baking with Yeast Information for solutions to widespread yeast FAQs.
Directions
- Put together the sponge: In a big bowl or the bowl of your stand mixer, whisk the water, complete milk, and yeast collectively. Add the two cups (260g) flour and stir with a spatula or wood spoon till a thick batter kinds. Cowl frivolously and permit to double in measurement, about 60-90 minutes. Typically this may take as much as 2 hours. *I don’t advocate a hand mixer for this dough as a result of the dough is just too thick and heavy.*
- Add the remaining dough components together with the honey, butter, lemon juice, remaining flour, and the salt. With a dough hook attachment, or utilizing a spatula or wood spoon (and a few arm muscle!), beat on medium pace/combine till the dough comes collectively and pulls away from the edges of the bowl, about 3 minutes. If the dough appears too moist to a degree the place kneading (subsequent step) could be not possible, beat in additional flour 1 Tablespoon at a time till you will have a workable dough, much like the pictures above. Dough needs to be mushy and just a little sticky, however nonetheless manageable to knead with frivolously floured palms.
- Knead the dough: Preserve the dough within the mixer and beat for an extra 8–10 full minutes, or knead by hand on a frivolously floured floor for 8–10 full minutes. If the dough turns into too sticky in the course of the kneading course of, add 1 extra Tablespoon of flour at a time to make a mushy, barely cheesy dough. Don’t add extra flour than you want; you don’t want a dry dough. After kneading, the dough ought to nonetheless really feel just a little mushy. Poke it along with your finger—if it slowly bounces again, your dough is able to rise.
- 1st rise: Flippantly grease a big bowl with oil or nonstick spray. Place the dough within the bowl, turning it to coat all sides within the oil. Cowl the bowl and permit the dough to rise in a comparatively heat setting for two hours or till double in measurement. (For a tiny discount in rise time, see my reply to The place Ought to Dough Rise? in my Baking With Yeast Information.)
- Grease a 9×5-inch loaf pan.
- Form the dough: When the dough is prepared, punch it all the way down to launch the air. Flippantly flour a piece floor, your palms, and a rolling pin. Roll the dough out into a big rectangle, about 8×15 inches. It doesn’t must be excellent—actually, it’ll in all probability be rounded on the sides. That’s okay! Roll it up into an 8-inch log and place within the ready loaf pan.
- 2nd rise: Cowl formed loaf. Permit to rise till it’s about 1 inch above the highest of the loaf pan, about 1 hour.
- Regulate oven rack to a decrease place and preheat oven to 350°F (177°C). It’s finest to bake the bread in the direction of the underside of the oven so the highest doesn’t burn.
- Optionally available oat topping: If you wish to add the elective oat topping, add it proper earlier than baking the bread. With a pastry brush, brush the risen loaf with egg white, then sprinkle the oats on high.
- Bake the bread: Bake for 36–40 minutes, or till golden brown on high. In case you discover the highest browning too rapidly, loosely tent the pan with aluminum foil. (I often add it across the 20-minute mark.) To check for doneness, should you gently faucet on the loaf, it ought to sound hole. For a extra correct check, the bread is finished when an instant-read thermometer reads the middle of the loaf as 195–200°F (90–93°C). Take away from the oven and permit bread to chill for a couple of minutes within the pan on a cooling rack earlier than eradicating the bread from the pan and slicing. Be at liberty to let it cool fully earlier than slicing, too.
- Cowl leftover bread tightly and retailer at room temperature for as much as 1 week.
Notes
- Freezing Directions: Put together recipe by way of step 6. Place formed loaf in a greased 9×5-inch loaf pan or disposable loaf pan, cowl tightly, and freeze for as much as 3 months. On the day you serve it, let the loaf thaw and rise for about 4–5 hours at room temperature. Bake as directed. You may as well freeze the baked bread loaf. Permit the bread to chill fully, then freeze for as much as 3 months. Thaw within the fridge or at room temperature, then reheat as desired.
- In a single day Directions: Put together the recipe by way of step 6. Cowl the formed loaf tightly and refrigerate for as much as about 15 hours. A minimum of 3 hours earlier than you want the bread the subsequent day, take away from the fridge, maintain lined, and permit to rise on the counter for about 1–2 hours earlier than baking. Alternatively, you possibly can let the dough have its 1st rise within the fridge in a single day. Put together the dough by way of step 3, then cowl the dough tightly and place within the fridge for as much as 12 hours. Take away from the fridge and permit the dough to totally rise for two extra hours. Proceed with step 5.
- Particular Instruments (affiliate hyperlinks): Stand Mixer or Massive Glass Mixing Bowl with Wood Spoon or Silicone Spatula | 9×5-inch Loaf Pan | Rolling Pin | Pastry Brush for elective topping | Immediate-Learn Thermometer | Wire Cooling Rack
- Milk: Low-fat or nondairy milk work right here, however complete milk produces phenomenal texture and I extremely advocate it.
- Yeast: I often use prompt yeast. You need to use energetic dry yeast as a substitute, with no modifications to the preparation. Rise occasions shall be barely longer. Reference my Baking With Yeast Information for solutions to widespread yeast FAQs.
- Flour: Be sure that your complete wheat flour is recent. Examine the date on the bundle, and don’t retailer it uncovered. Complete wheat flour can develop into rancid if saved for too lengthy, and your bread will style bitter. You need to use all complete wheat flour on this recipe, or substitute 1 cup (130g) of bread flour for a barely taller, fluffier loaf. You need to use 1 cup of bread flour within the sponge in step 1 OR reserve it for the remaining dough in step 2. If utilizing 1 cup (130g) of bread flour in step 2, you’ll additionally want the 1/3 cup (43g) of complete wheat flour.
- Honey: Honey produced the most effective tasting bread. In a pinch, you should use common granulated sugar or brown sugar. However you’ll miss out on that honey taste. I’ve not examined different sweeteners.
- Can I form this right into a spherical boule? No, this dough wants the construction of a loaf pan. As an alternative, chances are you’ll like this no-knead seeded oat bread.
- Doubling this recipe: For finest outcomes, I like to recommend making two separate batches of dough. It is a large, heavy dough and the sponge will take a really very long time to rise, and so will the kneading step. It’s finest to make 2 separate doughs.
- Complete Wheat Rolls: I like to recommend my mushy complete wheat rolls recipe, or you possibly can strive my multigrain bread/rolls recipe as a substitute.
- Tailored from Sandwich Bread and Complete Wheat Rolls
Key phrases: complete wheat bread